.....come enjoy some handmade creations and heartfelt experiences. I'm glad you're here & hope you'll come back often.
Showing posts with label Cricut. Show all posts

Wednesday, July 11, 2012

SNS Christmas in July Blog Hop

Welcome to my page on the Sparkle N Sprinkle Chistmas in July Hop!  So glad you could join us for some cool fun this summer!  Hopefully you've arrived here from Jill's Blog.  If not, you'll probably want to go to the SNS Home Blog for all the details and to start from the beginning.  We have lots of great holiday & winter ideas to share with you so you can cool off from the summer heat.  And don't forget there's five great prizes that will be awarded too!


I have a really fun shaped card for you today.  I just LOVE shaped cards!  I used Stampette Set 443S - Snow Family (on sale this month!) to make this great holiday snow globe card. 
Click any photo for a closer view

The main image was stamped with Memento ink and colored with Copic markers.  Then I added lots of glitter!    The snow & trims on the snow people were accented with a glue pen and Sparkling Snow glitter (a must have for any crafter!).  The snowdrifts on the tree and on the snow people's hats were done in Bridal glitter.  Bridal & Sparkling Snow are both "white" glitters; so I thought I'd give you a couple real quick pointers about their differences and where to use them.

Sparkling snow is semi-transparent & "super sparkly".  Bridal glitter is a bit more "white" since it's an opaque glitter and not quite so sparkly.  So.....Sparkling Snow worked perfectly where I wanted some of the stamp lines to show through & gave me lots of sparkle.  And the Bridal glitter was great for where I wanted to cover up parts of the image with "piles of snow"!  Perfect!

And then for the really fun part!!  To make this card really look like a snow globe; the snowflake layer was done on Embossable Acetate so it looks like glass! The snowflakes were stamped all over the outer edge of the globe and embossed with White Detail Embossing powder.  Since you will heat the powder to melt it; be sure you use Embossable Acetate or it will melt &/or shrink up like a "Shrinky Dink."  Trust me, I can vouch for that LOL!  I had another acetate near my work area and grabbed that first ......should have taken a pic - all twisted, curled, and tiny as can be now he he!  Guess I wasn't thinking on that one!

After you heat your snowflakes on the proper acetate, you'll turn the acetate over and attach it with the snowflakes facing in.  This makes it look even more like the snowflakes are inside the globe!  For the base & top piece, I added some brown cardstock that had been embossed with a wood grain embossing folder and highlighted with some brown ink.  The saying on the plaque was heat embossed with Clear detail embossing powder, cut out with a Spellbinders Petite Oval, and then accented with more Sparkling Snow glitter.  And then the front & back of the card was held together with the large snowflake brad at the top.

This is a really neat card to make for a special someone this holiday season.  Why not get a head start & make up a couple right now!  Full instructions for this card can be found in the SNS Art Gallery here. 

I sure hope you enjoyed today's project!  After the winner's are posted on the SNS blog Saturday,  I'll have another holiday card for you later that day using another one of the Snowmen Stampette sets!  So be sure to stop back for that.  Better yet, become a follower of my blog & you won't miss any posts!

Now hop on over to Shanna's Blog to continue with the hop and get some more great ideas!  Don't forget to leave a comment to let me know what you think and qualify for the prizes.  And Thanks so Much for stopping by!!

Until next time,
***Julie***

Thursday, May 31, 2012

National Scrapbooking Month

Whew!!  I can't believe another month is slipping by - how DOES that always happen SO fast?!?  It's been as busy as always around here.  Lots and lots of end of the year activities for the kids - field trips, picnics, you name it.  Plus, over Memorial Day weekend; we just had our annual Saddle Up for St. Jude.  Many of you know that we're a couple of the main organizers for this big event; so that takes up a lot of time in May.  The ride was a great success again this year and we were able to raise a lot of funds for the kids and the St. Jude Children's Research Hospital.  More about that in another post.  But with all the prep for that & the kids activities - well, the month has flown by!

But before this month is completely over, I wanted to recognize that this month was in fact National Scrapbooking Month.  Most of you know, I'm not a big scrapbooker - more of a "photo album embellisher"....if there is such a thing lol!  But recently our design team for Sparkle N Sprinkle was asked to design a couple pages so everyone can see how well all the great SNS products work for scrapbooks.  So in honor of the last day of Scrapbooking month; I thought I'd share one of those designs with you.

This was a bit of challenge for me since I don't do this too often.  But as is often the case, you end up being quite pleased with the results when you challenge yourself!  This layout was for an annual trip to Lake Erie (in PA) that we started taking a few years back with my parents, sister & her kids, and us.  It's a bit of a drive to get there, but it's always so much fun!

The hardest part of the layout (in a way) was trying to pick only a couple pictures for the layout.  I think that's one of the big reasons I don't scrap too much.....I take tons of pics & I love them all!  Hard to put them all on a layout though.  But I was really pleased with how well I did narrowing this down - I think I was really able to capture some of the best parts of the day in just these few pics. 

This layout is so much more pretty in person (isn't everything!) - it's sooo sparkly.  And sparkly & my camera just don't seem to get a long very well recently.  But I took a bunch if closeups so you can see some of the details a little better.
Most of the page was done using Set 403 - By the Seashore.  This set has so many great pieces for anything beachy  - scrapbook pages, cards, you name it!  A definite must have set!

The title was done with super sparkly Hit the Beach & Poolside embossing powders - our go to powders for beachy things!  And I did the title with a fun SNS technique where you make layers using EP & sticker paper that are then torn to resemble waves crashing on the beach. Very fun for a page title!

My subtitle was made extra fun by stamping it over top of the bright & firey sun (which is from Set 431 - Summer Swirl).  The whole piece was then embossed with Sparkle embossing powder to make it super shiny & sparkly.  Then it was popped up above the birds.

If you look really close at the top photo (the close ups didn't come out quite right for this part), you can kind of see that I also accented the larger pics.  A little Waterscape glitter on the waves & some Celestial glitter on the sand adds that extra spark that really makes the main pictures stand out.


The cute little frames for the mini pics were made by using two of the circle scenes from Set 403 and then cutting out the pics with a Spellbinders circle & layering it over the original picture in the design. A little Waterscape glitter around each pic for extra shine & what a cute little frames they make.  Great accent touches for the whole page!  I really like the sayings on these circles & thought this made such a neat way to use these!  (Don't you love the pics in them too....I love the waves crashing around him and the sea gull with it's reflection - just perfect!)


Well, it's a little late, but Happy National Scrapbooking Month everyone!  Hope you enjoyed this layout!

Until next time, 
***Julie***

Wednesday, May 16, 2012

Sparkle N Sprinkle Endless Summer Blog Hop


Ah, Summer’s here (almost!) and the stampin’ is easy.... and fun!  Hopefully you’ve hopped here from Shona's Blog.  If not, you’ll probably want to hop back to the Sparkle N Sprinkle Home Blog because the Sparkle Team has a bunch of great summery projects for you.  All the details for this hop & the PRIZES will be listed there too!

For this hop, I’ve created a project that’s colorful, fun and super versatile, but still easy enough to save you lots of time for the pool, the beach, havin’ a picnic, or just kickin’ back in the hammock.  It’s so easy to get your stamping in & still have lots of time for all your summer fun!

And what says summer more than anything?..... flip flops!  Since I love shaped projects, I decided to do a fun flip flop shaped design.  And I thought it would be neat to cover my flip flops with flip flops – too fun, lol.  The flip flop stamp is from Set 456 - Surfin' Woody (on sale this month!)  And the assembly for this is pretty straightforward.....stamp, color with Copics, add the saying (from Set 431 - Summer Swirl) with embossing powder, and then add the ribbon & flowers.  But what's really fun about this design is what you can do with it! 


*Obviously you can use it as a card - it would make a great birthday, thinking of you, note card, or even a get well card depending on the saying you use (more about that below)!
*How about attaching this to the front of a gift bag for a really pretty present
*Or tie it to the gift bag handle and use it as a tag
*Make it the focal point on a scrapbook page 
So many great uses for this fun design!


Now about changing out the saying....
One of the hardest parts of this card was deciding what saying to use.  Not only were there soooo many great choices; but many of the choices are what make the design so versatile!  Switch the saying & there's no end to what you can use this for!  Here's just a sampling of some of the many great ideas I considered - there's lots more you might like too!


(click on the set names to link to any of these great sayings / sets on the SNS website)
For a birthday - cards, tags, or gift bags:
 "A Gift for You" - Set 449 - Wine Tableau
"Just for You" - Set 444S - Just for You
"Treat Yourself" or " You're a Sweetie" - both on Set 374 - Sweet Treats
"For My Friend", "A Gift for You", "Just for You", etc - Set 423 - Fill the Jar
Lots of great birthday sayings on - Set 416 - Happy Birthday

How about a get well card:
"The Cure for Everything is Salt Water" - Set 404 - Ocean Treasures
"Hope you're back on your feet soon" - Set 325 - Rodney Sea Critters  (this will work best on the inside of the card, but what a great saying for a summer get well card that's shoe shaped!)

For a scrapbook page:
"A Day at the Beach", "Beach Bum", "Endless Summer", etc - Set 403 - By the Sea Shore
"Life is Sweet", "Cherish Each Day" - Set 392 - Dani's Umbrella
Don't forget all the beachy sayings on Set 455 - Surf's Up 
(the sample on the right wasn't my favorite, but it gives you the basic idea of making it as a main accent for a scrapbook page)

For any use:
"Kick Back & Relax" - Set 373 - Cocktails
"It's 5 O'clock Somewhere" - Set 417 - Cocktails II 
"If the Shoe Fits...Buy One in Every Color" - Set 242 - Shoes
There's many, many more sayings for a Thinking of You or general Note card too!

Can you believe all the great choices and that's just a handful of them.  Do I have your creative juices flowing - so many great possibilities!

Well, I hope you enjoyed this project today.  With so many different ways you can use it; I sure hope you'll make one up yourself soon!! Full instructions for this design can be found on the SNS Gallery here.  Now hop on over Shanna's Blog to continue on your way and see lots more great designs! Don't forget to leave a comment on each stop to qualify for the great prizes and thanks so much for spending a little time with us today!

Until next time,
***Julie***

Thursday, April 26, 2012

Crafting with the Ladies

Hi Everyone - if you'll bear with me for a bit today; this is going to be a long one.  But I thought I'd share a little of my "adventures" today before I get to some projects.  Last week I was pretty busy because I had three crafty "get-togethers" all in one week.  All three were small gatherings, but since I was in charge of two of them; I had a good bit of time invested in crafty gatherings last week.  But they were all so worth it!

One of the gatherings was the monthly Stampin Up "Stamp A Stack" I go to.  So fun to just walk in, "plop down", and have everything ready to go to make a bunch of cards and share some great company.  That's assuming you finish your cards.....which we rarely do because we have so much fun socializing too - lol!  It's a really nice crafty night out though!

The two gatherings I ran involved planning some projects and of course choosing and packing "essential supplies" (read everything) from my massive collection of stamps, inks, papers, pencils, markers, tools, embellies, etc. etc. etc.  Packing seems to take FOREVER!  Well, see if this sounds about right.....I need to pack all the basics mentioned above (big task right off the bat)... then of course I might want to dry emboss - need to pack the Cuttlebug & all the folders.....and then if the Cuttlebug goes; the Spellbinders might as well go too......or if it's a Cricut gathering - then that would be my Cricut, Gypsy, cutting mats, tools etc (and maybe still my Cuttlebug & EF's so I can emboss)......probably also going to need all my SNS EP's, glitters, or both and the heat gun too then......what about ribbons.....rhinestones....scissors, paper cutter.  It never ends!  And ask anyone that knows me, I'm rarely able to get it down to less than a car full - particularly when I'm in charge of the gathering.  Don't want to forget anything someone might need.  Lord help me!  I'm completely lost without access to all my goodies.  I'm going to need a studio on wheels pretty soon.  And no, I don't mean those cute little scrapping totes (got one of those too).  I could fill about four of those!  I know, I know, there must be a program for people like me - LOL!

But despite the craziness of packing; it's always so much fun to get together and craft!  It's really great to put aside a bit of time to share ideas & good times.  So I thought I'd also share a little from my two recent get togethers with you, my online friends - one today & the other a little later.

My first gathering was a Cricut Swarm.  I have an amazing Love-Hate relationship with my Cricut (& my Gypsy).   But in the end; don't know how I ever did without them.  If you don't know what a Swarm is; I'll tell you that they're held all over the US & each one is run a little differently.  But the main things that seem to always be about the same is crafting with the Cricut, sharing, socializing, and a little snacking too - lol!  I started the Swarm in our area a year ago because they sounded like so much fun!  We've met four times so far and have been having a lot of fun with this.


We've have a wide variety of projects brought to the Swarms.  Here's some of the main projects brought this time.


This get well card was one of my projects - love this little old fashioned truck card.


The papers I did this in were from a collection that was a great find I came across last year around the holidays.  It's not from any name brand I've ever heard of.  But it's a huge collection with awesome coordinated prints & was perfect for this card.  Sadly I think it was a one time only - just available for the holidays deal.  But I was smart enough to snatch up a second one for my sister in law.  Really glad I did - haven't seen them again since then.    

Back to the card - for a fun little touch, I added these great little silver studs to the centers of the tires so they look like they have hub caps.  So cool.


The inside saying is from Sparkle N Sprinkle (of course!)  And it matched the card so perfectly.
I also did the card in another color combo.  I thought the red truck version looked pretty great too!  I just love how this card turned out & have already sent a couple of these out to family/friends. 


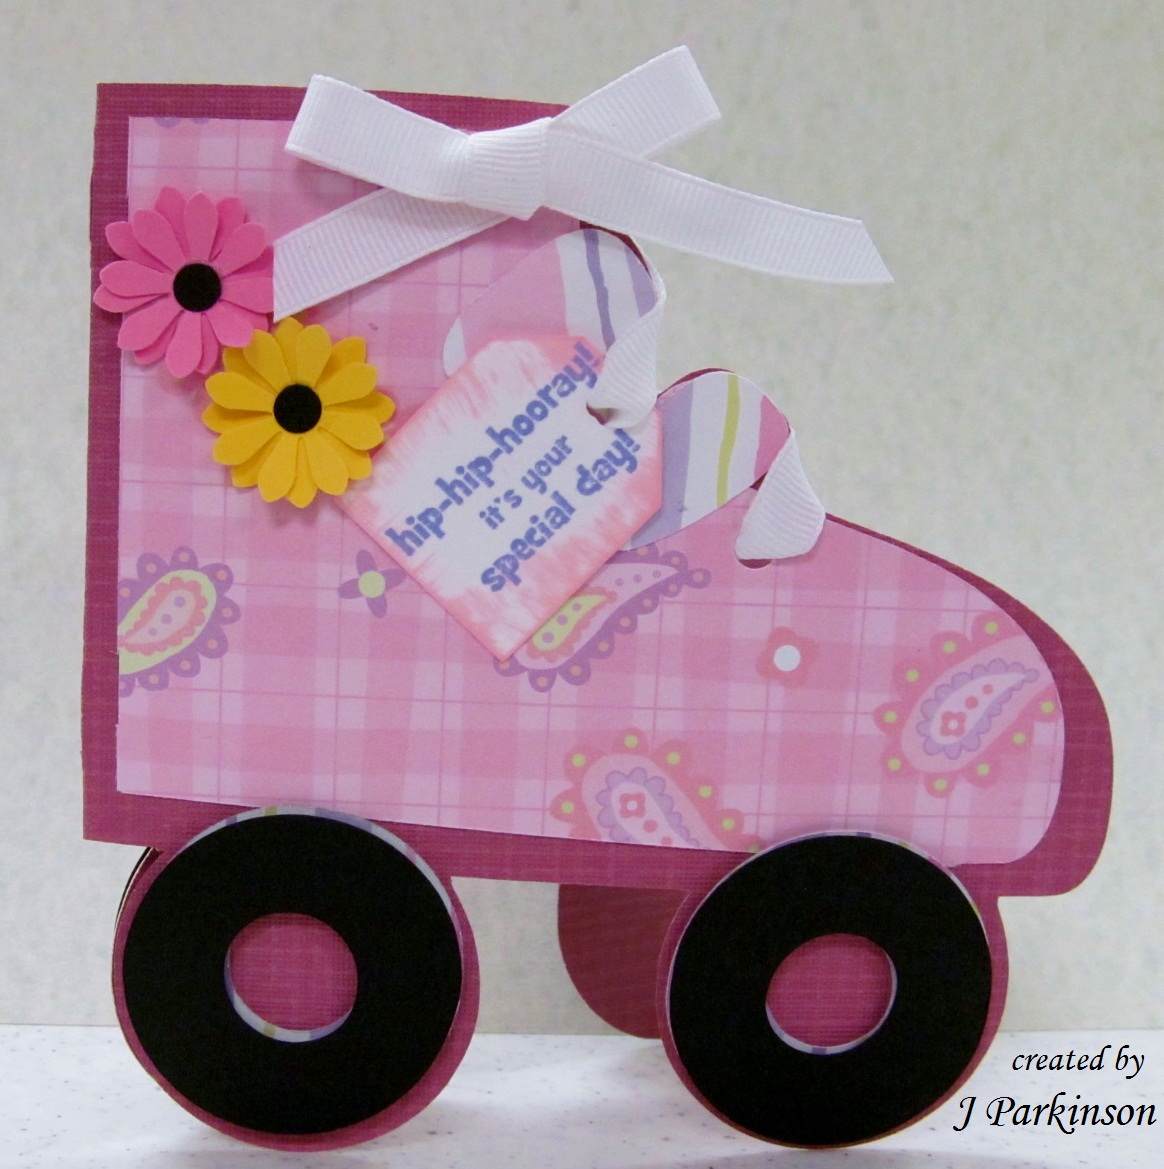
One of my good friends brought this adorable roller skate card done up in both boy & girl colors.  I love shaped cards; so this was lots of fun & so sweet.
And my sister in law did this really fun party hat card. Who doesn't need a bunch of birthday cards on hand and this one is so fun with it's bright colors & sparkling accents.  I just realized now that we forgot to put the birthday saying on, but I can do that later.  Cute, cute.


We did have a couple other projects.  But since there was only a few of us and we were having such a good time sharing ideas; we decided to keep those for the next time. 


Lives are so busy these days; it's sometimes hard to find time to set aside for something like this.  But it's so worth it if you can squeeze it in.  Crafty ideas, time with friends, and time to just let it all go - you can't beat it!  Hope you enjoyed hearing about some of my "crafty adventures" and seeing some of the projects we did.  And I really hope you'll find some time to get together with some of your crafty friends sometime real soon!


Until next time,
***Julie***

Wednesday, April 4, 2012

April Sketch Challenge at SNS

Have you seen the Sketch Challenges over at SNS?  Each month a new sketch is released for you to have fun and create with.  And one lucky participant wins a stamp set of their choice!  Fulls details for this monthly contest and how you can enter can be found on the SNS blog page HERE.  Check it out!


So I was playing with some of SNS's fun car stamps when I realized I had a great idea for this month's sketch.  Don't you just love how the road scene mimics the sketch?!  Fun, fun, fun.


SNS April Sketch Challenge


I turned the sketch on it's side, used the road as the main design element and then used two different fun scenic papers to complete the look.  I just loved those cute little clouds & trees for this look.  Granny was done in Memento ink and colored with Copic markers.  Isn't she a hoot?!  It's a little hard to see but I also added some Sparkling Snow glitter to the stripes on the road and around Granny for a little more "pop". (Remember to click on photo's for the best view).

Let me know what you think and don't forget to click on the link above to see all the details for the contest.  Plus you can see what a few more of the designers did with this month's sketch while you're there too.  Sure hope you'll join in on the fun with this month's challenge! 

Until next time,
***Julie***
Supplies:
Stamps - Sparkle N Sprinkle
Glitter - Sparkle N Sprinkle
Embossing Powder - Sparkle N Sprinkle
Dies (Round & Square) - Spellbinders Paper Arts
Die Cut (Road) - Provo Craft / Cricut
Markers - Copic
Papers - Trees: Mementa  Clouds: My Minds Eye

Wednesday, March 21, 2012

SNS Flower Child Blog Hop

Welcome to my stop on the Sparkle N Sprinkle Flower Child Blog Hop! Hope you're having lots of fun and have arrived here from Shona's delightful blog!  If not, you may want to go back to the beginning on the SNS Blog so you don't miss any great projects or details about the prizes being given away!

I know you have lots of hopping to do, but if you'll indulge me just a bit I have some thoughts & SNS info for you to start with today.  Are you a card maker? into scrapbooking? a paper crafter? Did you know that Sparkle N Sprinkle stamps & products are great for all of these types of projects (and More!)  And did you also know that Sparkle N Sprinkle will be expanding it's exposure this year by attending lots of the big scrapbooking shows?  If you're a scrapbooker - SNS is looking forward to meeting you!  If you're not into scrapping, these shows have so many products that are great to use in any type of paper crafting; you'll definitely want to check one out!  So if SNS isn't coming to your local stamping show this year, be sure to check them out at one of the many scrapbooking shows they'll be at this year.  A list of all the shows SNS will be attending can always be found on the Convention Calendar on the website.  Check it out - will SNS be near you soon?  Come see us!  (Remember you can click on any bold word to be taken directly to more info!)

So with that in mind, I thought I try a floral scrapbook page for this month.  I have to tell you, I'm not a scrapbooker.  But I love how this turned out!

Now for any of you "non-scrappers"...  I know SNS has a big following of card makers out there, but I'd like you to consider something.  If you're anything like me, you put lots and lots of time & yourself into your beautiful creations.  Why not put some of that same time into making something that will be saved and treasured for many years to come!  When you think about it, kinda beats wondering if the person you give your card to keeps it and enjoys it more than "once".  Why not give it a try?!


As I mentioned, this is my first major scrapbook endeavor. It's a 12 x 12 layout done with the beautiful Sweet Briar Frame from the popular Floral Set 270.  I chose lovely subtle peaches & aqua and the wonderful coordinated sayings from the Hummingbird & Flowers set 451 (I love these inspirational sayings).  They're highlighted in gorgeous Jamaican Dream embossing powder.  And that great title saying was done in sparkling Sangria Star embossing powder from the new Tuscany powder line for the perfect "attention getter".


 Gorgeous Spellbinders lace pieces frame the whole page and delicate little pearls accent the edge of the designer paper.  I'll admit, it did take me quite a while to put this together, but remember, it's a first attempt on my part.  And more importantly, I'm slow.....I fuss ALOT lol!  But I'm really pleased with how this turned out and am really glad that I put the effort into something that I know is going to be looked at over and over for many years to come!


Full instructions for this layout can be found in the SNS Art Gallery here. Don't forget to leave some comments before you hop along!  Then it's time to hop on over to the Charlene's lovely blog to see what she has in store for you on her blog.  Stop back late Saturday and I'll have the winners of the hop posted with another project using this same pretty frame for a great home decor project.  Hope to see you then!
Until next time,
***Julie***

Wednesday, February 8, 2012

Sparkle N Sprinkle Spring Fling Blog Hop

Welcome to my stop on the SNS Spring Fling Hop!  Hopefully you're arriving here from the delightful Karalee's Blog.  If not, you may want to hop back to the SNS Home Blog to start at the beginning and get all the details about this month's hop.  As always, great prizes are being awarded - so do hop along with us for a Spring Fling!

For this hop, I have a "Springy" floral card with one of my favorite techniques for Wow factor - I hope you agree! This beautifully sparkly Stained Glass effect is created using the Glitter on Acetate technique from the Sparkle N Sprinkle Tips & Techniques section.   And this time it comes with a little surprise twist.....


After stamping the image from the Framed Florals - Stamp Set 370 onto acetate with Staz On ink, glitter is "painted on" to the image using SNS's great Brushable Glue.  While it's white while you work, the glue turns completely clear when dry revealing all the beautiful, shimmering colors in your "glitter painting".  Sparkle N Sprinkle has soooo many beautiful colors to pick from - your glitter painting palette is endless!  But here's the little twist.....


You're not restricted to just glitter when you use this "Glitter on Acetate" technique!  Sparkle N Sprinkle also has oodles of beautifully sparkly embossing powders too!  On this card, I chose to use the extra sparkly Royal Purple Embossing powder for the purple flowers & the arches on the top of the acetate piece.  It's applied exactly the same as the glitter & looks just as great as the glitters do!  Now just to be clear, don't heat it like you normally do with embossing powders - lol.  Just adhere it with the brushable glue and let the glue dry - just as you would with the glitters.  And wellah! you have another great way to use all those pretty embossing powders from SNS!  In this card, the royal purple EP was just as sparkly as the glitters I used.  But perhaps you'd like to do a project where some of your piece is sparkly and some of it is a more matte look.  You can also chose one of SNS's many embossing powders without glitter. It's a great way to create lots of contrast in a "Stained Glass" piece.
(Don't forget you can click on any picture for a better view or click on any bold text to get further info on the SNS site.)


It's so much fun to play with with all the beautiful glitter colors from SNS.  And now that you know this little tip, be sure to consider all the wonderful embossing powder choices for this technique too!  When you're looking for something extra special for that special someone - this technique is always a winner!  If you haven't already, be sure to try this out & have fun with it!

Now hop on over to Jill's Blog where there's always fun & interesting things awaiting you.  There's lots more Spring Fling ahead for you.  Don't forget to leave a comment before you hop on by and then enjoy the rest of the hop!  Thanks so much for stopping by!

Until next time,
***Julie***

PS - Stop back on Saturday to see the list of winners from this hop and I'll have another fun and "Springy" card for you from this same stamp set to share as well!  Better yet, become a follower & don't miss any posts!

A Favorite Guy Card

Hi Everybody! With Valentine's Day fast approaching, I thought I'd share one of my favorite "guy cards" for the holiday.  You have to admit, lots of guys don't go for all the red and pink - the ribbon and frills.  So I found a way to spread the love without all the "traditional"  hearts & flowers.  Here's a great way to get your message across with a "guy" twist.

This fun card was designed around Sparkle N Sprinkle's Love Is Sweet - Set 401.  

Using two stamps from the set, I created a couple fun street signs for this masculine card.  (Remember, you can click on any image for a better view).  The route sign was made using a Cricut and then stamped with the XO which was embossed with white detail embossing powder.  The detour sign was hand made.  It was stamped and embossed with Midnight Madness embossing powder.  For extra "oomf" (a technical term - lol), the black piece behind the sign was also embossed with Midnight Madness before it was layered behind the yellow.  Midnight Madness is a great dark embossing powder that has enough sparkle to make the card special without being too sparkly "for the boys".


I finished the card off with a fun street sign designer paper and my favorite guy embossing folder - diamond plate.  What a great way to let the guys in your life know how much they mean to you on Valentine's Day.  Or how about using this for an anniversary card or anyday!  Hope you enjoyed my card!

Until next time!
***Julie***

Supplies Used:
Stamps - Sparkle N Sprinkle
Embossing Powder - Sparkle N Sprinkle
Embossing Folder - Cuttlebug
Die cut (Interstate Sign) - Cricut
Designer Paper - Hot Off the Press/Paper Pizazz

Don't forget! The Sparkle N Sprinkle Spring Fling Blog Hop starts tomorrow; so be sure to stop back for that (great prizes, great spring ideas, great company) - See you then!

Thursday, September 22, 2011

Sparkle N Sprinkle Magical Winter Moments

Hi Everybody! Welcome to my stop on Sparkle N Sprinkle's "Magical Winter Moments" hop!  It may not be winter just yet, but if you're anything like me; those holidays sneak right up on you!  So now's the time to start preparing & we have just what you need - some great card samples to get your winter mojo going so you won't have to make cards at the last minute this year.  And better yet, most of the stamps featured are on sale for the rest of the month; so buy now & save a bunch too!  If you hopped here by way of Barbara's great blog ; then you're in the right place.  If not, you might want to jump back to the Sparkle N Sprinkle Home Blog & start from the beginning so you don't miss any of the great ideas.  Plus all the details  for how to qualify for some great prizes are there too - you definitely don't want to miss out on those either!

click any image for a larger view
For my stop on the hop I have two cards for you featuring the Tiny Tree stamp from the new Tis the Season - Set 439.  Going along with the theme, my first card brings back some Magical memories & really captures the sparkle!  When I saw the Tiny Tree in this stamp set, one of the things that immediately came to mind was those great Aluminum Christmas trees from our past  So I set out to recreate that look and feel.  What do you think - did I capture the feel of the Aluminum trees from years ago?  Or are you too embarrassed to admit you've been around long enough to know when these were all the rage - LOL!  There's so much sparkle on this card that the photo couldn't pick it all up, but the tree itself was done in Tinsel embossing powder (of course) and the frame around it was done with Tearific Tape and Sassy Silver glitter.  The final & crowning touch is the Silver Leaf Glitter Tinsel border which really reminds me of the aluminum branches on those trees.  I love how all those silvers look together and the whole look really takes me back to those old time trees.  And yes, I do admit to being old enough to remember them well!  Full instructions for this card can be found in the Sparkle N Sprinkle Art Gallery here.

For my second card, I went for the complete opposite look with the same stamp.  This time I went for a "Country Christmas".  With all the sparkle at Sparkle N Sprinkle; we don't do as many "non-sparkly" designs, but it's nice to do that look every once in awhile.  And for an added surprise, this card actually does use a sparkling embossing powder.  But the Log Cabin embossing powder I used has just enough to add a little spark yet still blend in perfectly with the country design.  

For an extra natural touch, instead of backing the tree with a paper layer; the tree was backed with a piece of burlap.  I love the look, texture, and dimension that the burlap adds.  And the gingham ribbon & buttons make the perfect accents to complete that country feel.  I really enjoyed creating this country style for something a little different and I like how it shows that you can create completely different looks with the same stamp.  Full directions for this Country Christmas card can be found  in the Gallery here.

Well, I hope you enjoyed my cards today.  Don't forget to leave a comment before you hop on to qualify for prizes.  I read and appreciate every comment.  Now hop on over to Karin's fun blog & enjoy the rest of the hop! 

"You see things and say, "Why?", but I dream things and say, "Why not?"  
                                                                                                                                                  George Bernard Shaw
Until next time,
***Julie***

Supplies Used:
Stamp - Sparkle N Sprinkle
Embossing Powders, Glitter, Glitter Tinsel - Sparkle N Sprinkle
Embossing Folders - Cuttlebug
Frame Die Cut - Spellbinders
Tag Die Cut - Cricut

Saturday, August 27, 2011

Blog Hop Winners Announced - Autumn Inspirations Hop

Winners from the Sparkle N Sprinkle "Autumn Inspiratons" Blog Hop have been announced.  Just wanted to pass those along in case you didn't get to see them yet.
*********************************************************
The Grand Prize was awarded to Aileen Freeman!
***********************************************************
Secondary winners (extra prizes)
1. From Donna Ellis's Blog: 2 glitter tinsels of your choice! – Karen A. Jones 
2. From Dawn Thomas's Blog: 3 embossing powders of your choice! - Linda Craig
3. From Linda Loew's Blog: 3 glitters of your choice! - Denise B
4. From Shona Erlenborn's Blog: 2 Sparkle N Soft colors of your choice! - Barb P
5. From Patti White's Blog: 2 Flocking colors of your choice! - Anita Braddock

More details (including details on what to do if you're a winner) are on the "home blog" - Sparkle N Sprinkle Blog.  And we've said before on previous hops & I'd like to repeat again myself because it's so absolutely true.....we truly enjoy & appreciate every comment   It encourages & inspires us more than you know!  Thank you so much for joining us & spending a little part of your day with us.  We're so glad you did!
*******************************
For an extra treat, I have another SNS (Sparkle N Sprinkle) fall card to share with you today.  This is another of my "Pre-Blog" designs that I wanted to share now.  This one may or may not appeal to everyone because it's a bit unusual; but it IS a completely fun card that is near and dear to my heart!

You see, for a similar SNS design request last fall; we were also asked to do cards with a fall theme - much like this recent project for the Autumn Inspirations hop.  Well, at that time, I was working with the really cute Brooke & Bailey baby sets from SNS.  Those two sets are a lot of fun & have so many great images & sayings - here's a peek at the two of them:
 

Click any photo or image for a larger view


So again...I'm working with these two sets when the fall themed request comes in & the request includes a suggestion to "re-purpose" everyday stamps into fall themed designs.  Well there it was, right in front of me....since I, like many people, create from their own life experiences or that which is personal to them - the answer was right in front of me.  Two of the four grandchildren in my immediate family (my daughter & my niece) were both born within a week of Thanksgiving.  Many people call them "turkey babies".  And since I have one and know one - I just had to create one for this design call.  Plus, the Bailey in Diapers stamp was perfect for this idea!  I just loved this card - cute, a little funny, and really unique.  What do you think?


The feathers can be done lots of different ways.  I used a Cricut to cut these, but they could easily be made out of a lot of different dies, punches, or even free hand. These ones are actually
flower petals!  They just happened to be the shape I was looking for - so let your creativity flow - think outside the box!  The saying was part stamped (the "Congratulations" from the same set as Bailey) and part done on the computer ("on your New Little Gobbler").  With cling stamps it's so easy to see through the acrylic blocks to make lining up with the computer text a breeze! And don't forget that the saying could easily be changed so that you could have a birth announcement, a shower card, or even one congratulating parents that found out they're expecting in the fall.  To finish the piece, the card and the saying piece were both accented with SNS Autumn Medley glitter for that extra "pop".

If you know anyone expecting in November; I'd bet they'd just love to receive a Baby Bailey Gobbler!  Or for that matter, Bailey would look great "dressed up" for a bunch of other holidays & events too!  Once again, let that creativity flow!!  If you do a "Bailey" card, be sure to let me know; I'd love to see yours!  Hope you enjoyed the card & congrats again to the Autumn Inspirations blog hop winners!!

"The good life, as I conceive it, is a happy life. I do not mean that if you are good you will be happy; 
                                                                      I mean that if you are happy you will be good."              Bertrand Russell


Until next time,
** Julie**

Supplies used:                                        
Stamps - Sparkle N Sprinkle
Glitter - Sparkle N Sprinkle
Die cut "feathers" - Cricut
Die cut label - Spellbinders Nestabilities
Embossing Folder - Sizzix
Dew Drops - The Robin's Nest
Markers - Copic                                      Full instructions for this card can be found HERE.

Sunday, July 17, 2011

For Your Paws

Hi again!  Well, I said I'd share another project today using the fun Sparkle N Sprinkle stamp "For Your Paws Only" and one that was not Christmas-y.  And so I will!  I did this one at the same time as the dog bones card, but this one is for the cat lovers this time!


Click any photo for closer view
This time I went with a gift bag.  And for cat lovers it's got to be a fish for the treat!  The fish was cut out on a Cricut machine, the saying was then embossed with By The Lake embossing powder, and then the entire fish & his details were all done with a Quickie glue pen and Aquamarine glitter.  I added a white stud that I drew the eye onto & added a fun "fish stringer" from jute rope.  One (or more) of these strung onto a rope would also be perfect for a fisherman.  The fish was pop dotted onto a Spellbinders Label One Nestability that was run through an embossing folder, attached to the bag & accented with paw print ribbon & coordinating rhinestones.  I just love this little fishy & how he's tied up with the rope!  I think any cat lover (or fisherman!) would love receiving this!  Below there's a close up too.  If you'd like to see the full instructions for this project, go to my gallery page at Sparkle N Sprinkle by clicking here.


Take a look at all that sparkling goodness!  Not only does all that Sparkle N Sprinkle glitter shine, but the embossing powder (which is also from Sparkle N Sprinkle) has it's own sparkling goodness too!  Well, I hope you enjoyed this project as much as the dog one.  And don't forget to always really take a good look at everything you can do with your stamp sets.  Sparkle N Sprinkle often has stamps like this that are intended for a particular holiday, but can be used for so much more!  More bang for your buck......I'm always a big fan of that!  Oh, and don't forget you can get the stamps individually or as part of the money saving set - always up to you!

Okay then, thought for today is.....

Life is a succession of moments. To live each one is to succeed.
Corita Kent

Hope you make the most of every moment!  
Unitl next time,
**Julie**

Supplies:
Fish die cut - Cricut
Label - Spellbinders Nestability
Embossing Folder - Cuttlebug
Stamp - Sparkle N Sprinkle
Glitter - Sparkle N Sprinkle
Embossing Powder - Sparkle N Sprinkle